top of page

No Collections Here
Sort your projects into collections. Click on "Manage Collections" to get started
Before and After: Remodeling of House in Waymart, PA

Before: Remodeling of House in Waymart, PA


Before: Remodeling of House in Waymart, PA
1/6
Before:
Prior to the commencement of the remodeling work, the house exhibited several issues that needed addressing:
1. Roof Condition: The existing roof was outdated and showed signs of wear, including missing shingles and leaks, which compromised the home's protection against the elements.
2. Windows: The dormer windows were old, inefficient, and had deteriorated frames, leading to drafts and reduced energy efficiency.
3. Siding: The siding on the dormers was faded and damaged, detracting from the overall appearance of the home.
4. Gables and Windows: The paint on the gables and windows was peeling and chipped, contributing to a neglected look.
5. Foundation: The foundation was exposed and showed signs of wear, with cracks and an unappealing surface that needed improvement.
Before: Remodeling of House in Waymart, PA
Before: Remodeling of House in Waymart, PA
1/6
After: Remodeling of House in Waymart, PA


After: Remodeling of House in Waymart, PA
1/4
Before:
Prior to the commencement of the remodeling work, the house exhibited several issues that needed addressing:
1. Roof Condition: The existing roof was outdated and showed signs of wear, including missing shingles and leaks, which compromised the home's protection against the elements.
2. Windows: The dormer windows were old, inefficient, and had deteriorated frames, leading to drafts and reduced energy efficiency.
3. Siding: The siding on the dormers was faded and damaged, detracting from the overall appearance of the home.
4. Gables and Windows: The paint on the gables and windows was peeling and chipped, contributing to a neglected look.
5. Foundation: The foundation was exposed and showed signs of wear, with cracks and an unappealing surface that needed improvement.
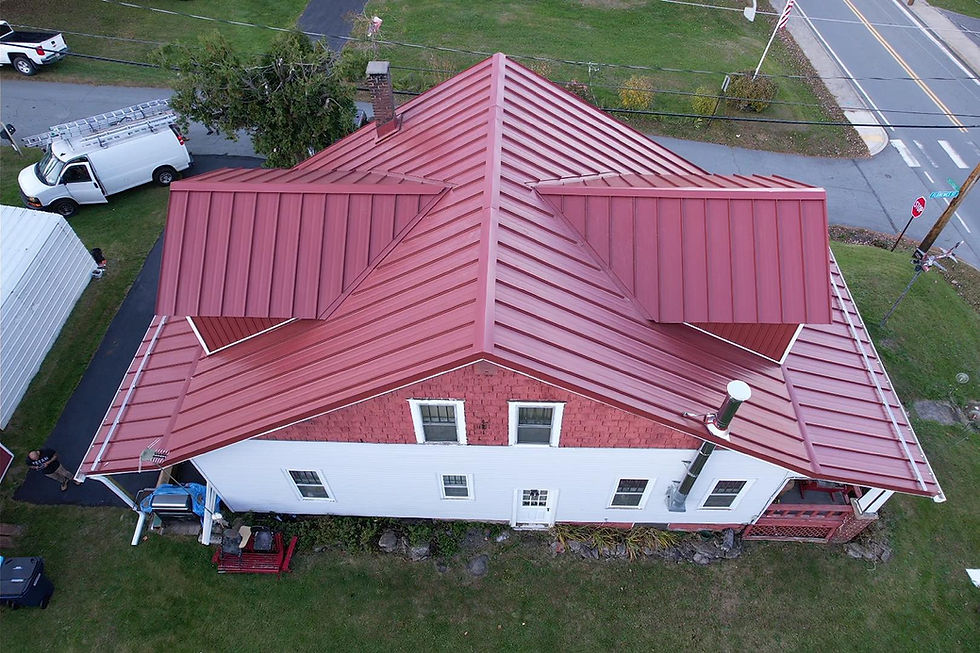
After:
1. New Metal Roof Installation:
The old roof was completely removed, and a new metal roof was installed. This choice not only improved the home's durability and weather resistance but also enhanced its energy efficiency and aesthetic appeal.
2. New Windows in Dormers:
The outdated dormer windows were replaced with new, energy-efficient models. This upgrade improved insulation and allowed for better natural light, enhancing the interior ambiance.
3. New Siding on Dormers:
The siding on the dormers was replaced with high-quality materials that matched the new roof and overall design of the house. This not only improved the visual appeal but also provided better protection against the elements.
4. Repainting of Gables and Windows:
The gables and windows were thoroughly prepared and repainted. This included scraping off old paint, repairing any damaged areas, and applying a fresh coat of paint to revitalize the home's exterior.
5.Refacing of Foundation:
The foundation was refaced to address cracks and improve its appearance. A durable stucco paint was applied, providing a clean, finished look while also protecting the foundation from moisture and further damage.

Before: Fabricated and Installed Handrail

Start of Project

During the Process
Before: Fabricated and Installed Handrail
1/4

After: Fabricated and Installed Handrail
After: Fabricated and Installed Handrail
1/1
Before and After: Fabricated and Installed Handrail
Before:
The space lacks safety or aesthetic elements, with no handrail or guardrails in
place. Stairs, walkways, or elevated areas may appear unfinished or unsafe,
lacking the necessary support or structure.
After:
A custom-fabricated handrail is expertly installed, providing both safety and
visual appeal. The handrail is securely fixed in place, enhancing the
functionality of the space while complementing the overall design. The finished
result adds security, style, and a polished look to the area.
Before and After: Garage Renovation
Before: Garage Renovation

Garage Before
Before: Garage Renovation
1/2
After: Garage Renovation
After: Garage Renovation
1/1
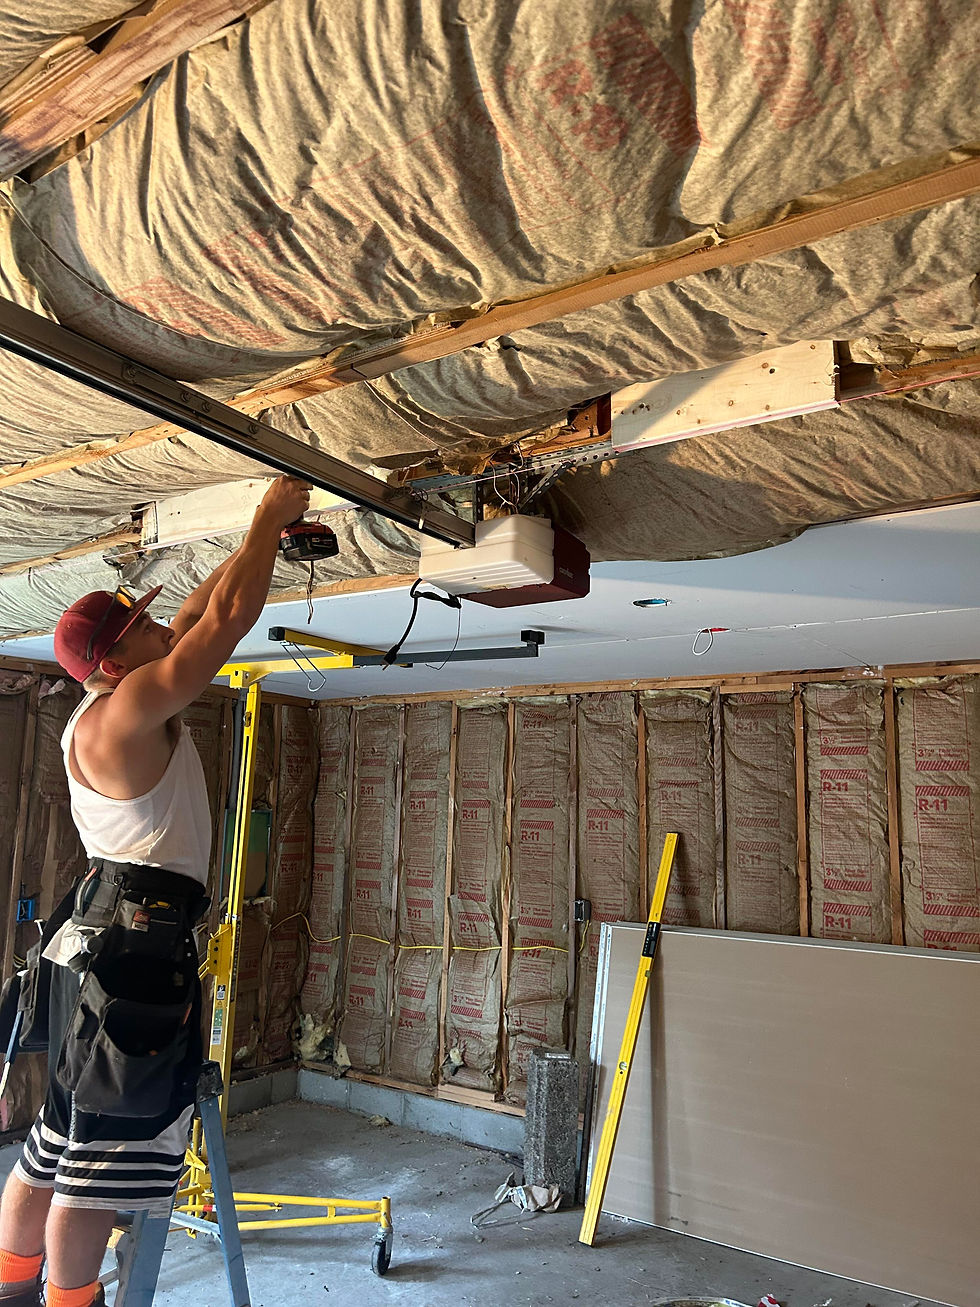
Before:
1. Outdated Structure: The garage had an aging structure with worn-out materials, including a deteriorating roof, cracked walls, and an unappealing exterior finish.
2. Inefficient Layout: The existing layout was poorly organized, with limited storage options and inadequate space for vehicles and tools. Clutter and disorganization were prevalent, making it difficult to utilize the space effectively.
3. Poor Lighting and Ventilation: The garage had insufficient lighting and ventilation, creating a dim and stuffy environment that was uncomfortable for use, especially during extended periods.
4. Lack of Insulation: The garage lacked proper insulation, leading to temperature fluctuations that made it unsuitable for year-round use, particularly in extreme weather conditions.
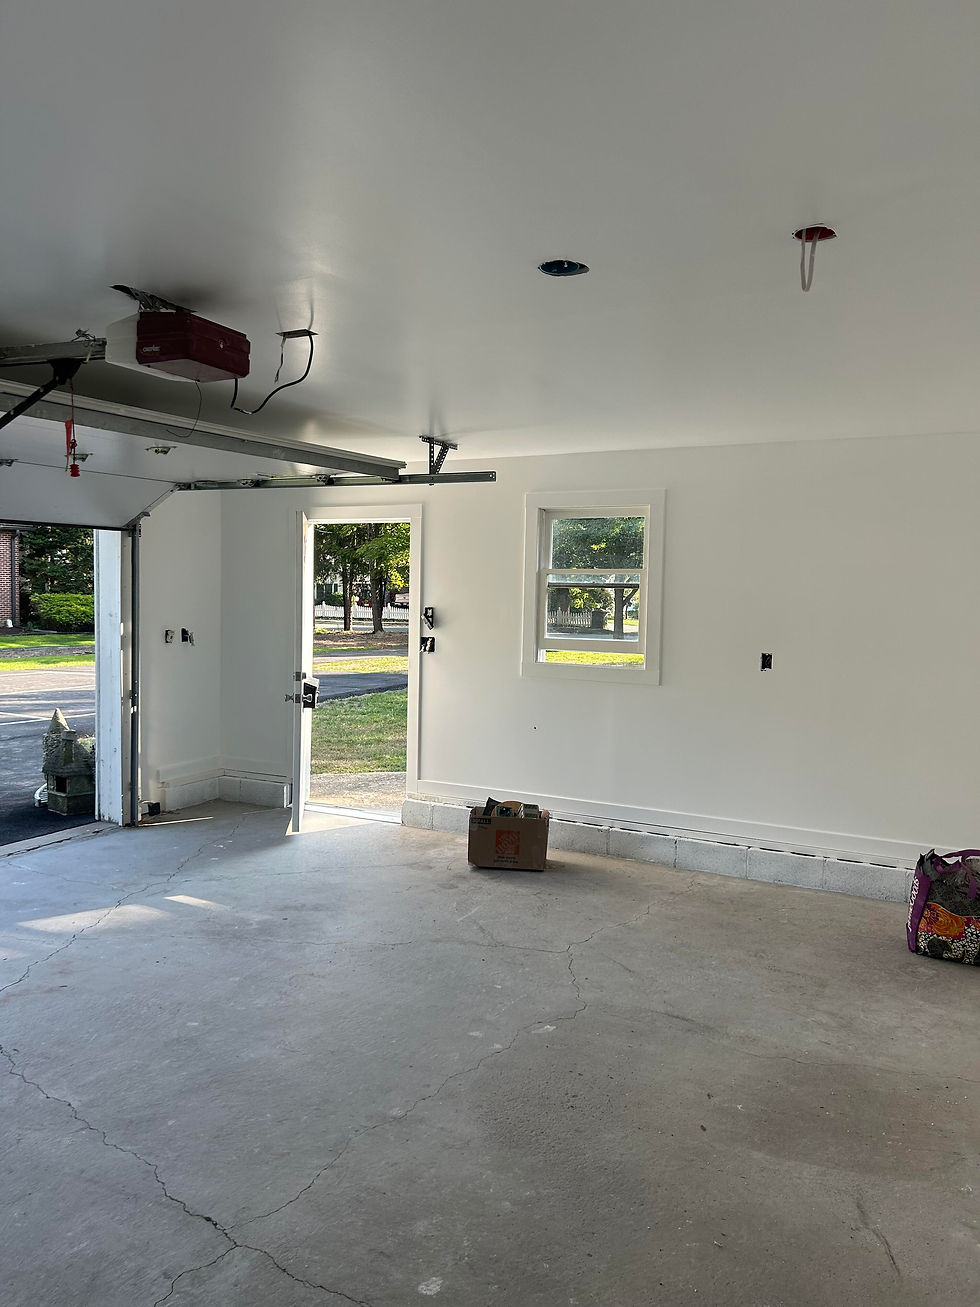
After:
1. Structural Repairs and Upgrades:
The renovation began with necessary structural repairs, including reinforcing the foundation, repairing or replacing the roof, and addressing any issues with the walls. This ensured the garage was safe and stable for future use.
2. Reorganization of Layout:
The layout was redesigned to maximize space efficiency. This included the installation of built-in shelving, cabinets, and workbenches to provide ample storage and workspace. The new layout facilitated better organization and accessibility for tools and equipment.
3. Enhanced Lighting and Ventilation:
New lighting fixtures were installed to improve visibility, including overhead lights and task lighting in work areas. Additionally, windows or vents were added or upgraded to enhance airflow, creating a more comfortable environment.
4. Insulation Installation:
Proper insulation was added to the walls and ceiling to regulate temperature and improve energy efficiency. This upgrade made the garage more comfortable for year-round use, whether for parking vehicles or engaging in hobbies.
5. Aesthetic Improvements:
The exterior and interior of the garage were given a fresh coat of paint, and new flooring was installed. Durable, easy-to-clean materials were chosen to withstand wear and tear while enhancing the overall appearance of the space.
Before and After: Summer House Pool Project

Before: Summer House Pool Project

PoolHouse-Project2

PoolHouse-Project8
Before: Summer House Pool Project
1/8

After: Summer House Pool Project

Completed Pool House

Completed Pool House
After: Summer House Pool Project
1/3
Before:
The area was an underutilized section of the yard, lacking shade, structure, or purpose. With minimal landscaping and no designated amenities, the space offered little in terms of usability or visual interest..
After:
The newly built pool house features a modern yet inviting design, fully integrated with the surrounding landscape. Key features include
a covered lounge area with seating, changing room and bathroom facilities, kitchenette/bar for entertaining, storage for pool equipment and accessories, and durable, weather-resistant materials for year-round use. Landscaping was updated to complement the structure, including new pathways, lighting, and greenery. The finished pool house creates a seamless indoor-outdoor experience, offering both style and functionality.
Before and After: 6x8 White Linden Privacy Fence Installation

Before: 6x8 White Linden Privacy Fence Installation


Before: 6x8 White Linden Privacy Fence Installation
1/3
After: 6x8 White Linden Privacy Fence Installation

After: 6x8 White Linden Privacy Fence Installation
1/2
Before:
The area is open with no fence or barrier, offering little privacy or security. The landscape may appear unfinished or exposed, with just the natural surroundings visible.
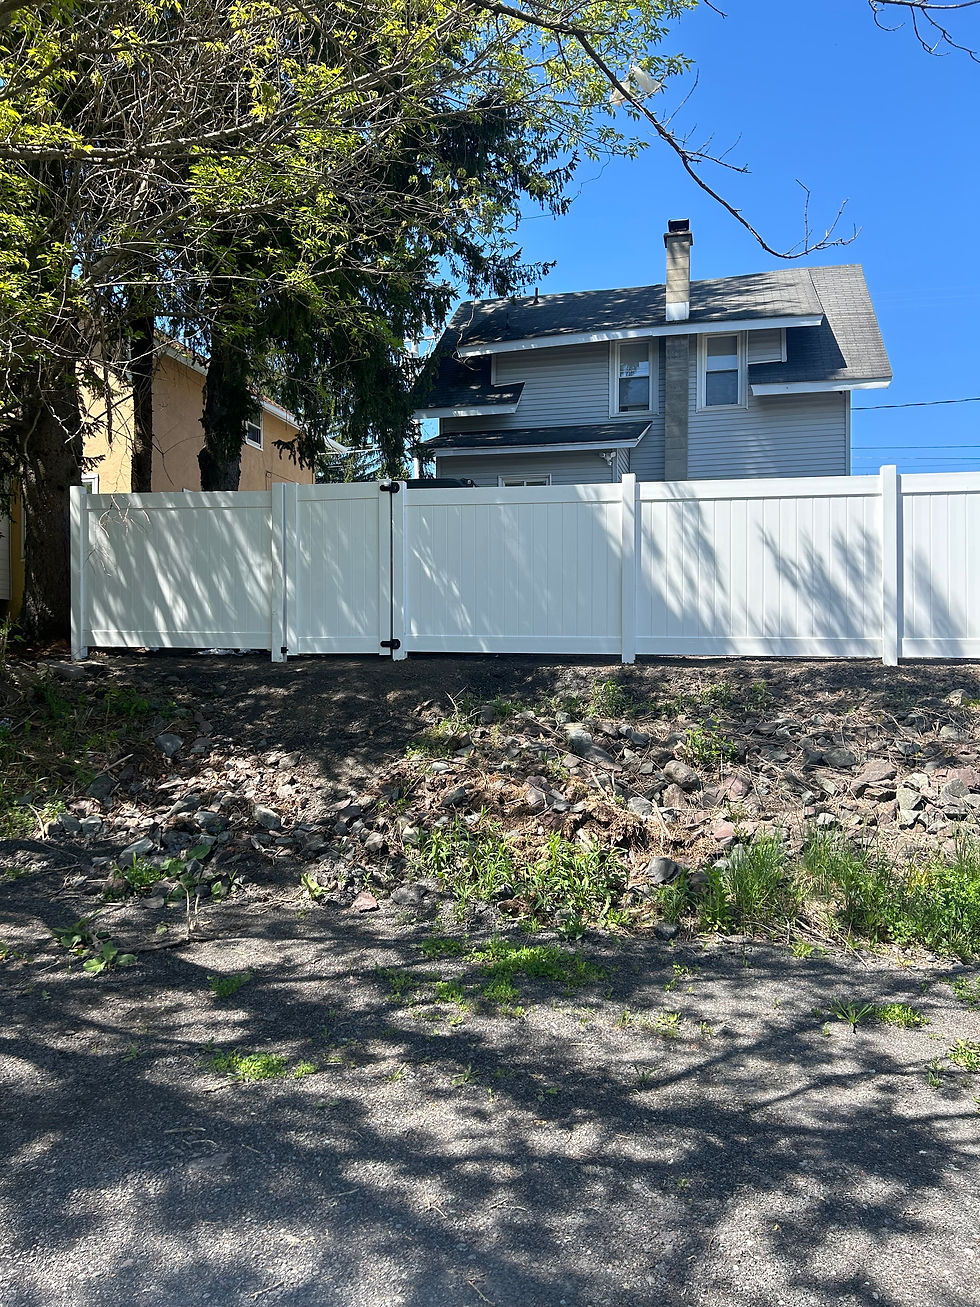
After:
A 6x8 white Linden privacy fence is installed, providing a clean, finished look. The fence offers enhanced privacy, security, and a well-defined boundary, with smooth, white panels that seamlessly blend into the environment
Before and After: Excavation Services

Excavation Services
Excavation Services
1/1

Excavation Services
Excavation Services
1/1
Before:
· The area is uneven, overgrown, or filled with debris, making it difficult to proceed with construction, landscaping, or other projects. The ground may be obstructed or not properly prepared for the next steps.
After:
· Excavation services have cleared and leveled the area, removing debris, rocks, or excess soil. The site is now properly prepared for further development, whether it’s for foundation work, landscaping, or other construction needs, creating a clean, usable space.
Before and After: Framing, Door Installation, and Sheetrocking

Before: Framing, Door Installation, and Sheetrocking


Before: Framing, Door Installation, and Sheetrocking
1/3
After: Framing, Door Installation, and Sheetrocking
Framing, Door Installation, and Sheetrocking Complete
After: Framing, Door Installation, and Sheetrocking
1/2
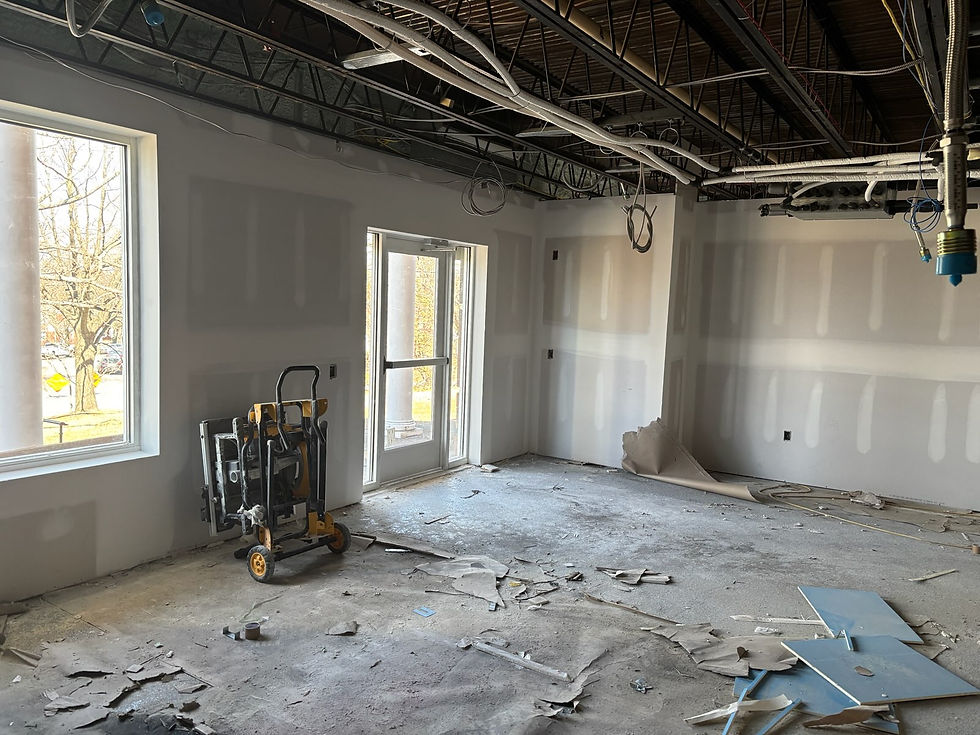
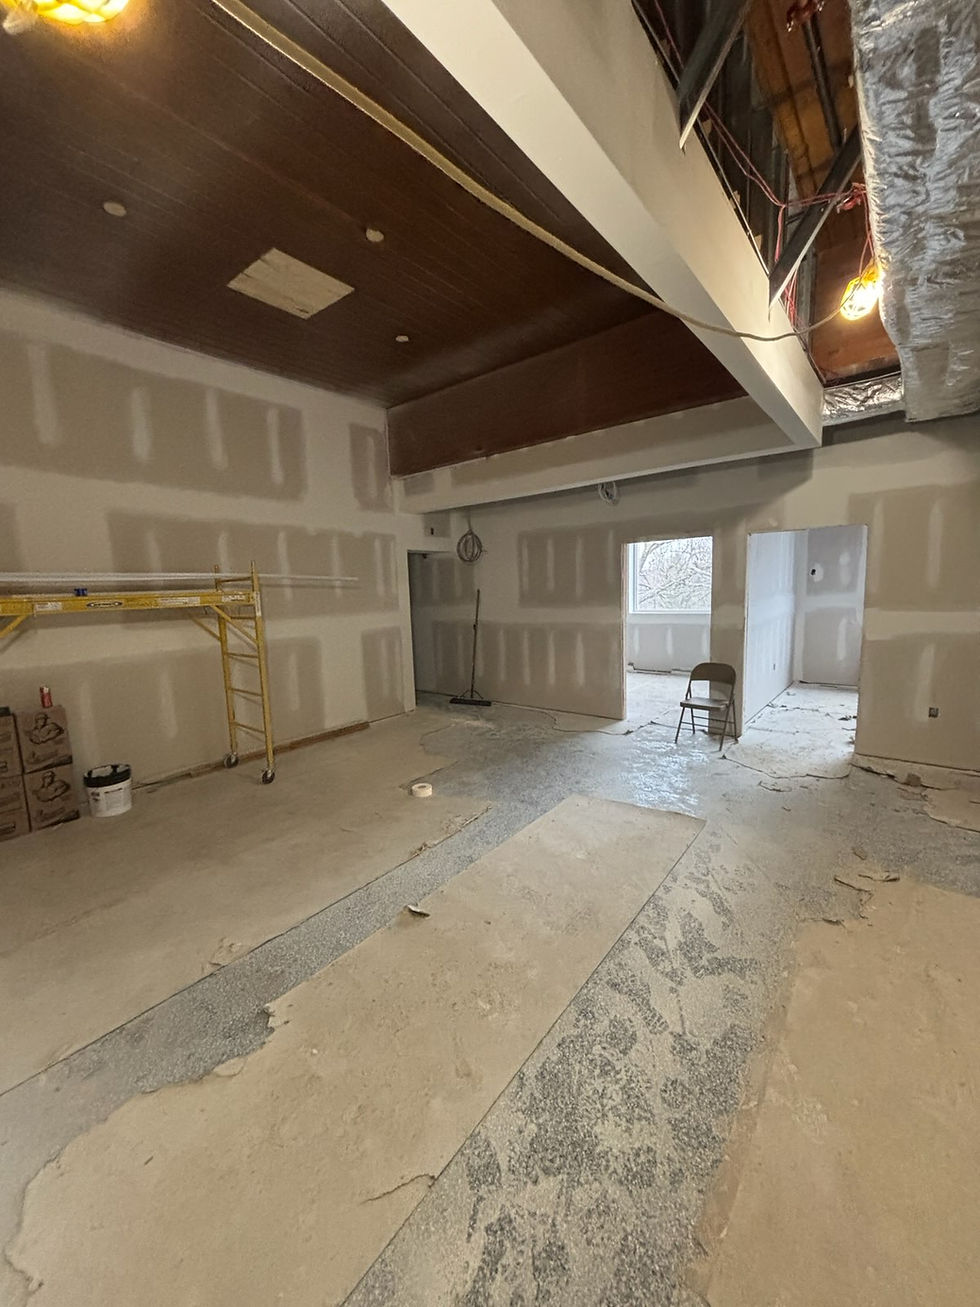
Before:
· Framing: The space is bare with exposed concrete walls and no defined rooms. Only the structural framework is visible, indicating preparation for walls and doors.
· Door Installation: The area has a rough opening, with no door or trim in place, just an empty doorway framed out.
· Sheetrocking: The walls are unfinished, with bare studs and possibly exposed wiring or plumbing, awaiting drywall installation.
After:
· Framing: The framing is complete, defining the rooms and structure. Openings for windows and doors are framed and ready for installation.
· Door Installation: Doors are hung, with trim and hardware (such as knobs and hinges) installed, giving a finished look.
· Sheetrocking: The walls are covered with smooth, finished drywall, with seams taped and mudded, ready for painting or other finishing touches
Before and After: Dog Sitting Company Fence Installation

Before: Dog Sitting Company Fence Installation

Dog Sitting Fence

Dog Sitting Fence
Before: Dog Sitting Company Fence Installation
1/4

After: Dog Sitting Company Fence Installation

Dog Sitting Fence Completed

Dog Sitting Fence Completed
After: Dog Sitting Company Fence Installation
1/3
Before:
A secure and sturdy fence is essential for the safety of your dogs. Before we begin the construction of your new fence, our team conducts a comprehensive assessment of your property. We discuss your specific needs, including the size and breed of your dogs, to determine the best fencing solution. Our experienced professionals will recommend materials and designs that not only enhance the aesthetic appeal of your yard but also provide a safe and secure environment for your pets to play and roam freely.
After:
After completing the construction of your new fence, we conduct a thorough inspection to ensure that it meets our high standards of safety and durability. We take pride in our craftsmanship and are committed to providing a secure space for your dogs. If you have any questions or need further adjustments, our team is here to assist you. Your pets' safety is our priority, and we look forward to helping you create a safe haven for them to enjoy!
bottom of page